GeoProcessing Tool
This tool aims to provide a set of geo-processing utilities on layers present in map. WPS calls are made by the tool to produce the result to be displayed in the map. Supported WPS processes are geo:buffer and gs:IntersectionFeatureCollection (the WPS plugin need to be installed for your GeoServer version in order to use this tool).
Note
The GeoProcessing Tool is not included by default in the MapStore configuration but it can be configured within an application contexts if needed or directly included in the standard application configuration.
Warning
To prevent possible errors in geometry overlay methods due to complex and heavy geometries, the JTS system property must be added to the GeoServer in use (the -Djts.overlay=ng should be enabled in JAVA properties).
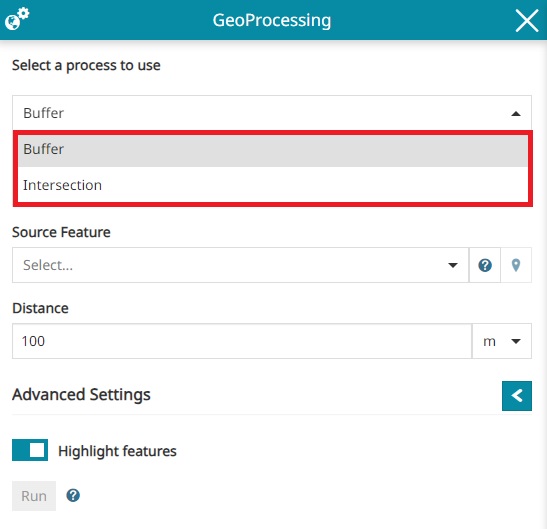
By clicking the GeoProcessing Tool  button, available in the Side Toolbar, a panel opens so that the user can choose the geographic operations between Buffer and Intersection.
Note
All the following layer types in MapStore are supported and can be used in the GeoProcessing tool:
- WMS and WFS layers in the TOC
- Measurements
- GeoJSON map imported
- Imported ShapeFiles
- Annotations
Buffer tool
The Buffer tool allows to create a buffer around the input geometries and when it is selected, the user can:
-
Select a layer from the Source Layer option drop down menu. The dropdown shows the layers available for the process from the ones present in TOC.
-
Select one of the layer features from the Source Feature option. The feature can be selected from the dropdown menu or directly clicking on map by activating the
 button.
- Insert the desired Distance for the buffer (supported are m and km).
When all mandatory process parameters have been provided, it is possible to click on  button to start the process to generate and visualize the buffer layer.
The buffer layer is added in TOC inside a new group created for the purpose.
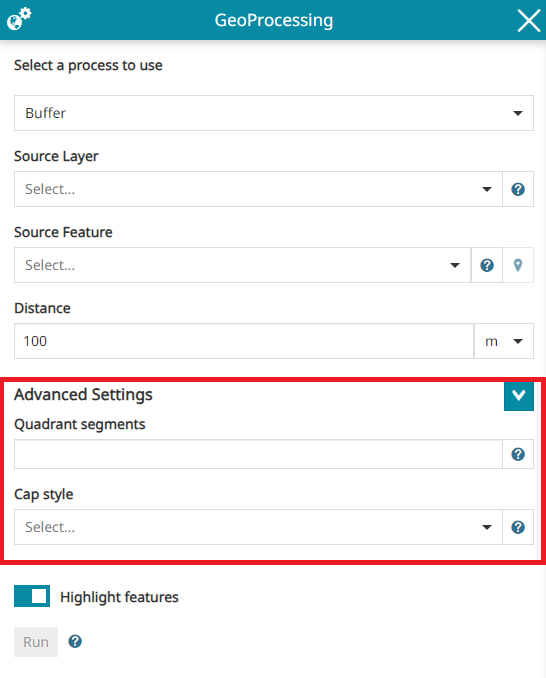
Advanced Settings
Enabling the Advanced options the user can include further (not mandatory) parameters for the Buffer process:
-
Enter the Quadrant Segments, that is the number of line segments used to approximate a quarter circle.
-
Select the Style for the buffer end caps choosing between
Round,FlatorSquare
Intersection tool
Once Intersection is selected as a process to be used from the first dropdown, the user can also select the layer to use as Source Layer for the intersection as well as the layer to be intersected with the given source (Intersection Layer option). For both options it is possible to select a feature to use for the intersection process; this is possible by enabling the buttons in order to select the layer features directly with a click on the map. If no layer feature is provided for one of the to layer options, the operation will be performed on the entire layer.
The user can then:
-
Select the Source Layer from the drop down menu.
-
Select the layer feature from the Source Feature. The feature can be selected from the drop down menu or by clicking directly on the map by activating the
button.
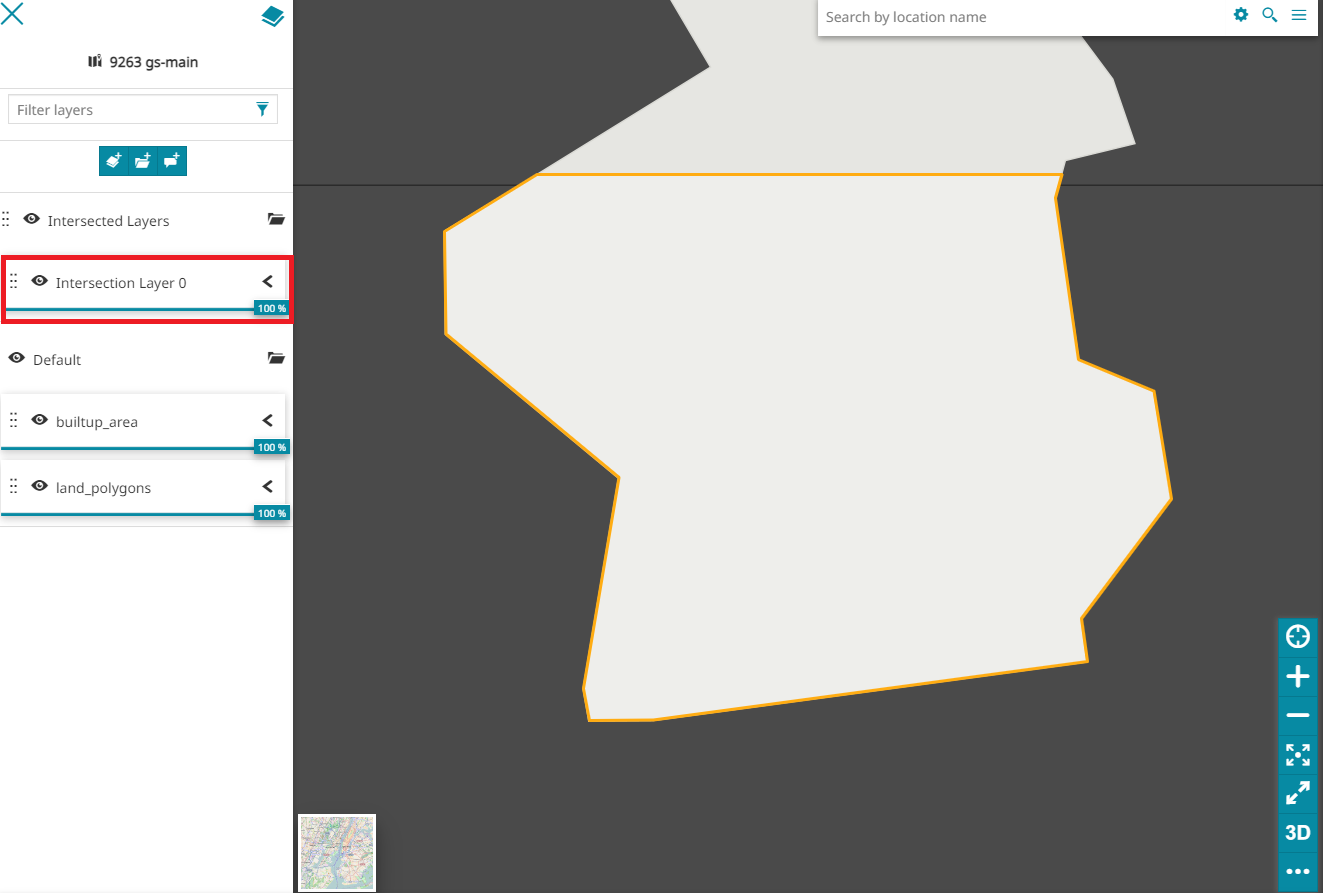
In the same way it is possible to select the Intersection Layer and the corresponding Intersection Feature to obtain the new intersected layer by clicking on button.
The new layer, result of the intersection of the features selected, will be added to the TOC inside a dedicated group and visible in the map viewer.
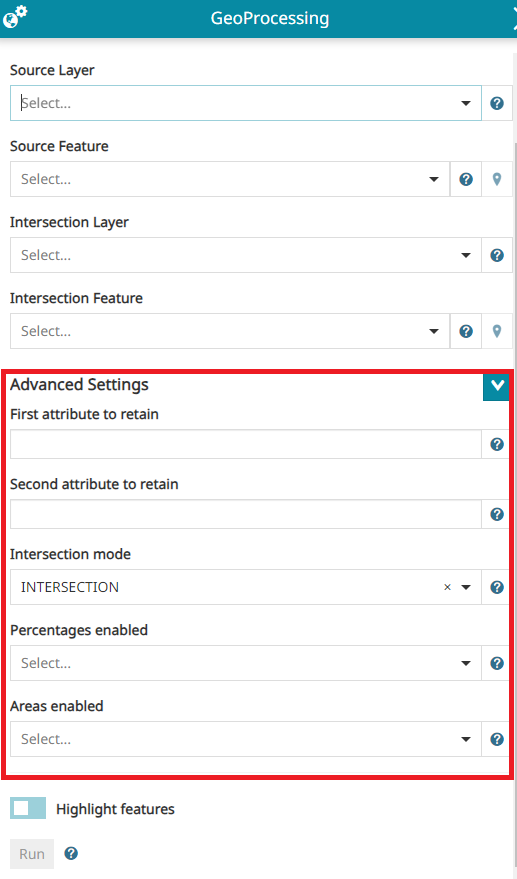
Advanced Settings
Enabling the Advanced options the user can include further (not mandatory) parameters for the Intersection process:
-
Enter the First attribute to retain, which is the first attribute to display
-
Enter the Second attribute to retain, which is the second attribute to display
-
Select the Intersection mode choosing between
INTERSECTION,FIRSTorSECOND -
Select the Percentages, choosing between
FalseorTrue, to indicate whether to generate area percentages. -
Select the Areas enabled, choosing between
FalseorTrue, to indicate whether to generate area