Adding Annotations
Mapstore lets you enrich the map with special features which expose additional information, mark particular position on the map and so on. Those features make up the so called Annotations layers.
Starting from a new map or an already existing one:
- Click on the Burger menu button
 from the main menu bar.
 - Click on the Annotations option from the list
 .
.
The annotation panel will open.
Creating a New Annotation
In order to add a new annotation:
-
Click on
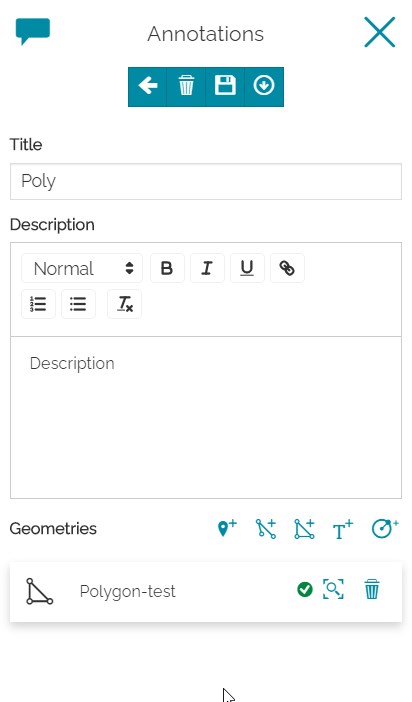
 , a new form will appear.
 -
Type a Title (required) and a Description (optional).
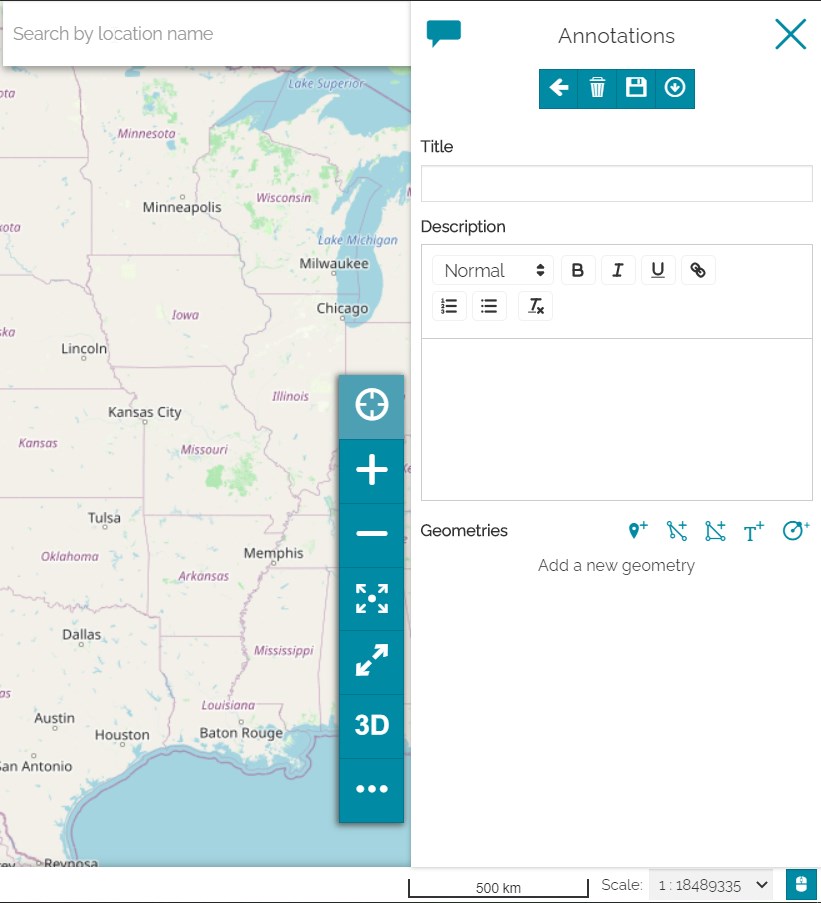
- Click on the geometry icon to define the annotation geometry and position. You have to select the annotation type first, then to draw it on the map.
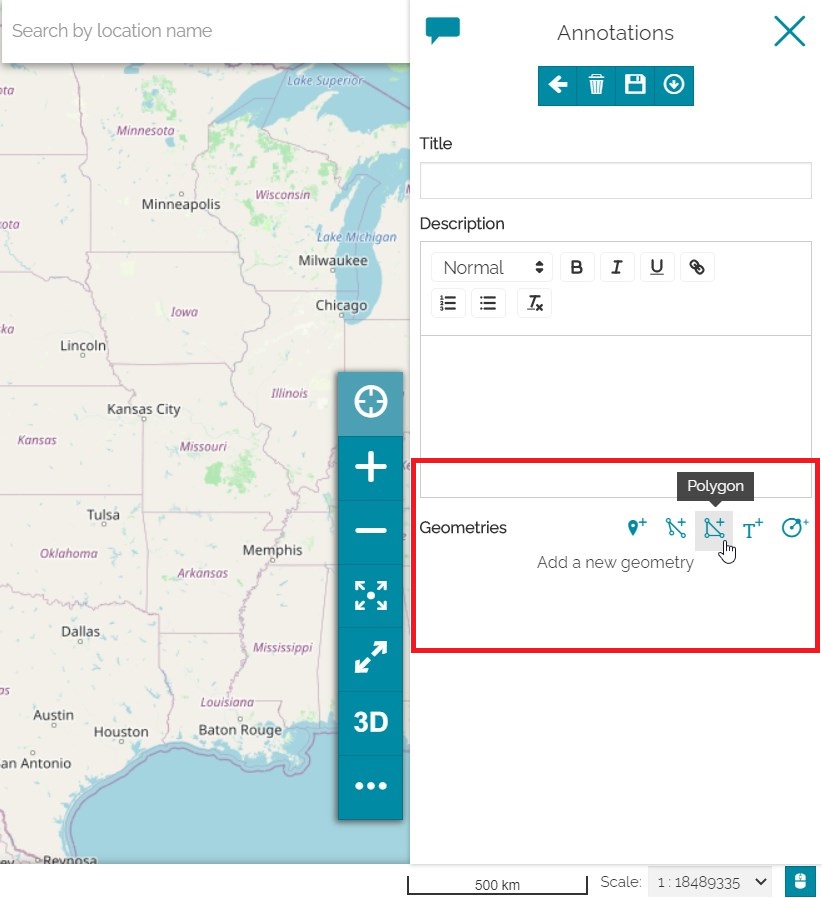
-
Select, for example, the Polygon type.
-
Click on the map to define the polygon vertices.
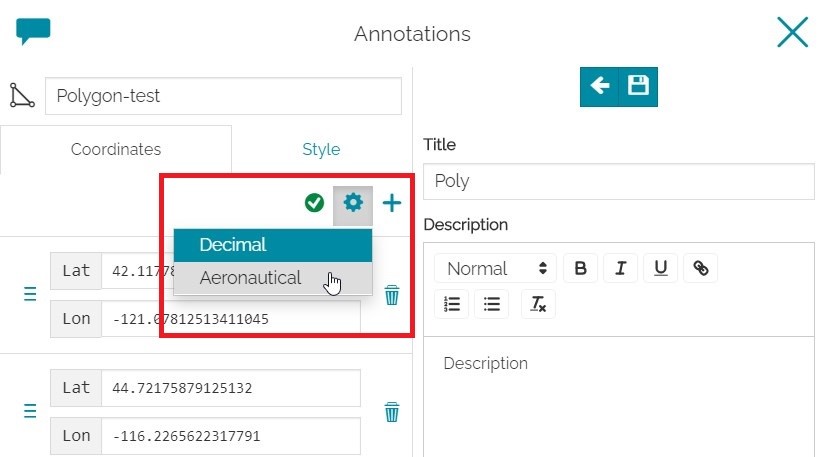
You can also insert new vertices, or edit existing ones, through the coordinates editor using Decimal or Aeronautical formats.
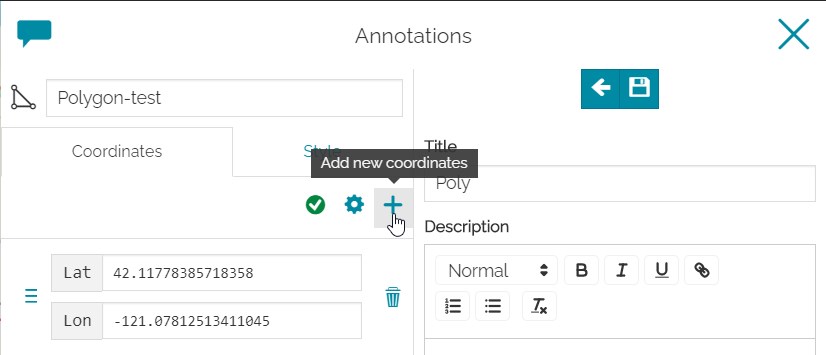
New vertices can be also added using the  button and typing the
 latitude and longitude values (see the picture below).
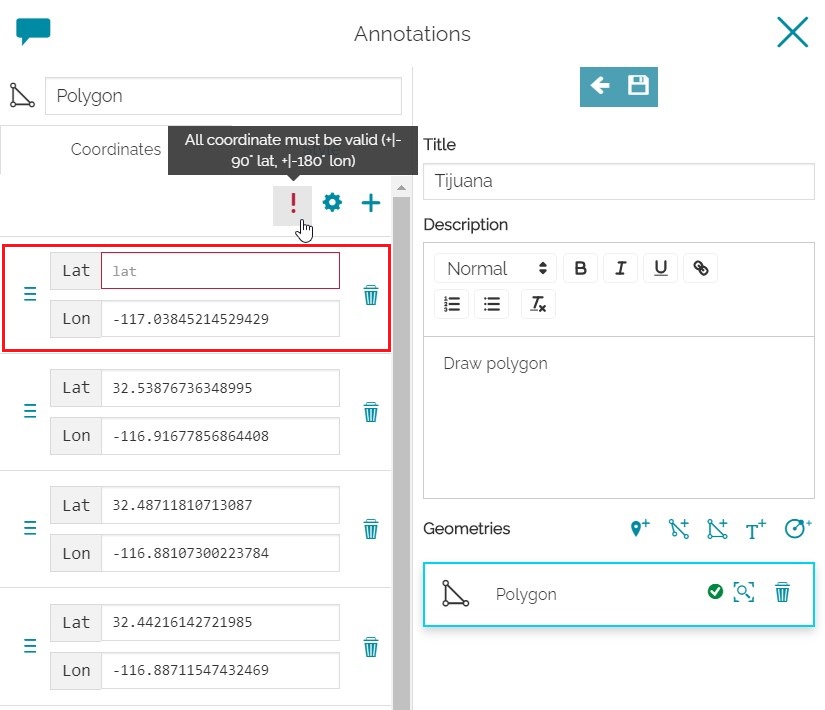
Invalid vertices are notified with a red exclamation point icon.
-
Click the Style tab of the annotation viewer (optional) to manage the annotation style (see the next paragraph).
-
Click on Zoom
 to zoom to the geometry of the annotation.
 -
Click on Delete
 to delete the geometry of the annotation.
 -
Click on Save
 to save the geometry information.
 -
Click on Save
on the main form to save annotation information.
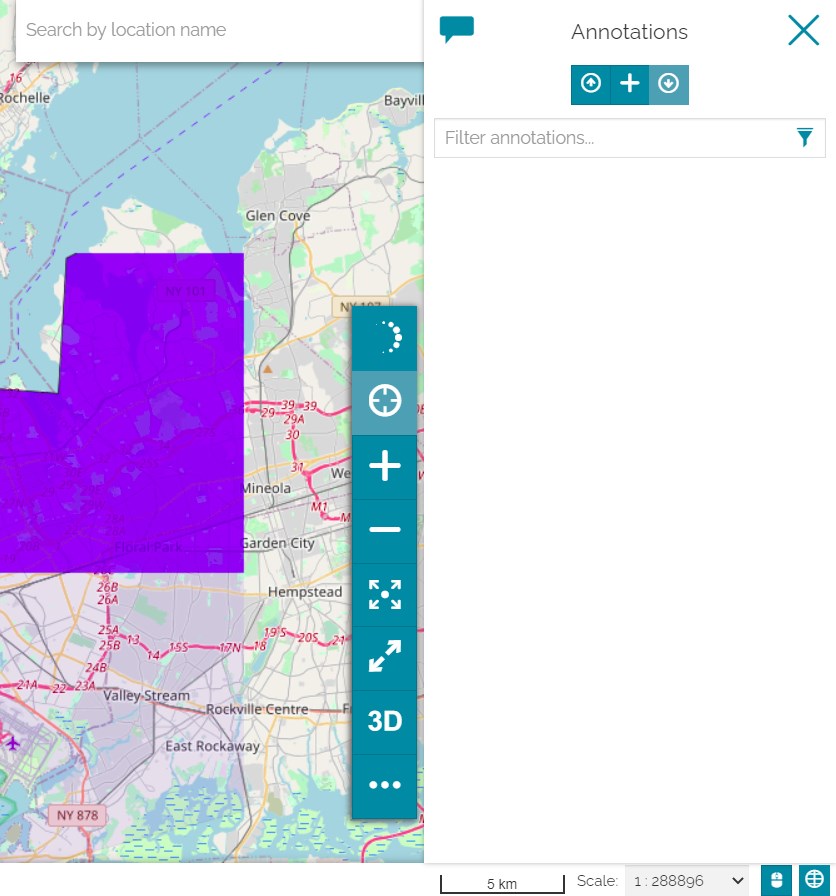
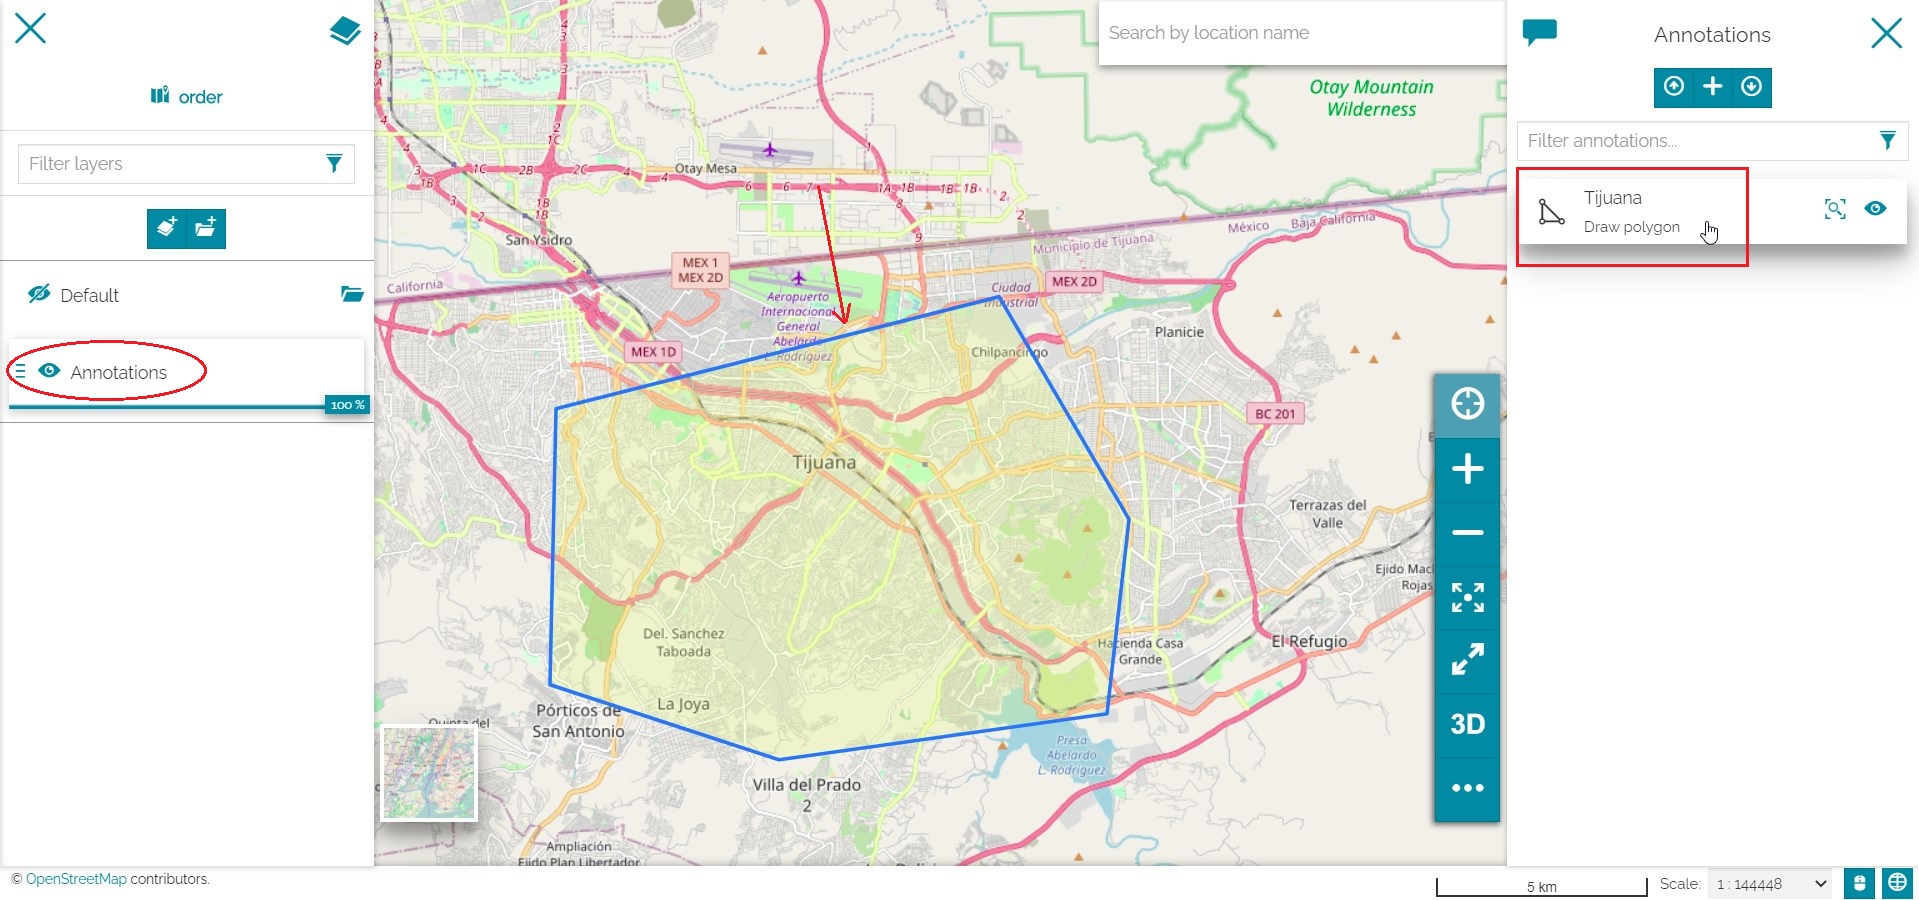
The annotations layer will be added to the TOC and the annotation will be visible in the annotations list as in the figure below.
Styling Annotations
Based on which type of annotation was chosen, MapStore allows you to customize the annotation style through a powerful editor. It is accessible from the Style tab of the annotation viewer. During the style editing a preview placed on top of the styler form shows a preview of the edited style.
Marker
MapStore provides two types of Marker annotations, so you have to choose what type do you prefer using the Type combo box (Marker is the default):
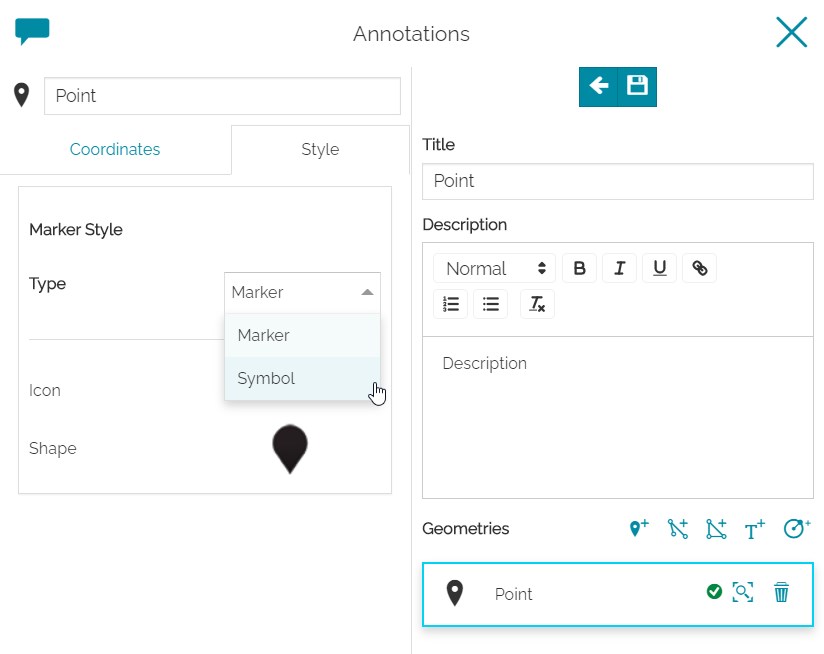
- Marker types can be customized through the following editor:
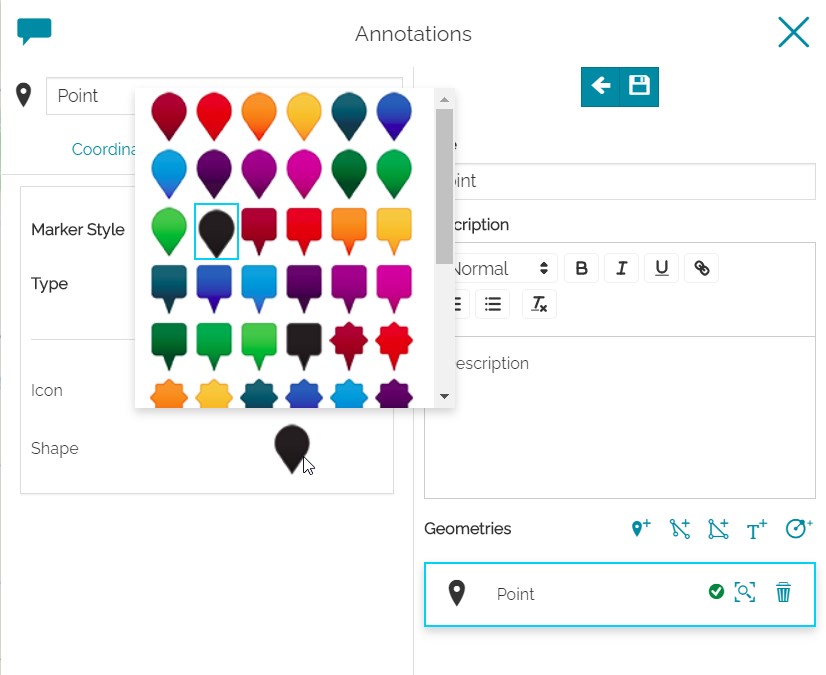
Choose the Shape, Color and Icon that best fit your needs.
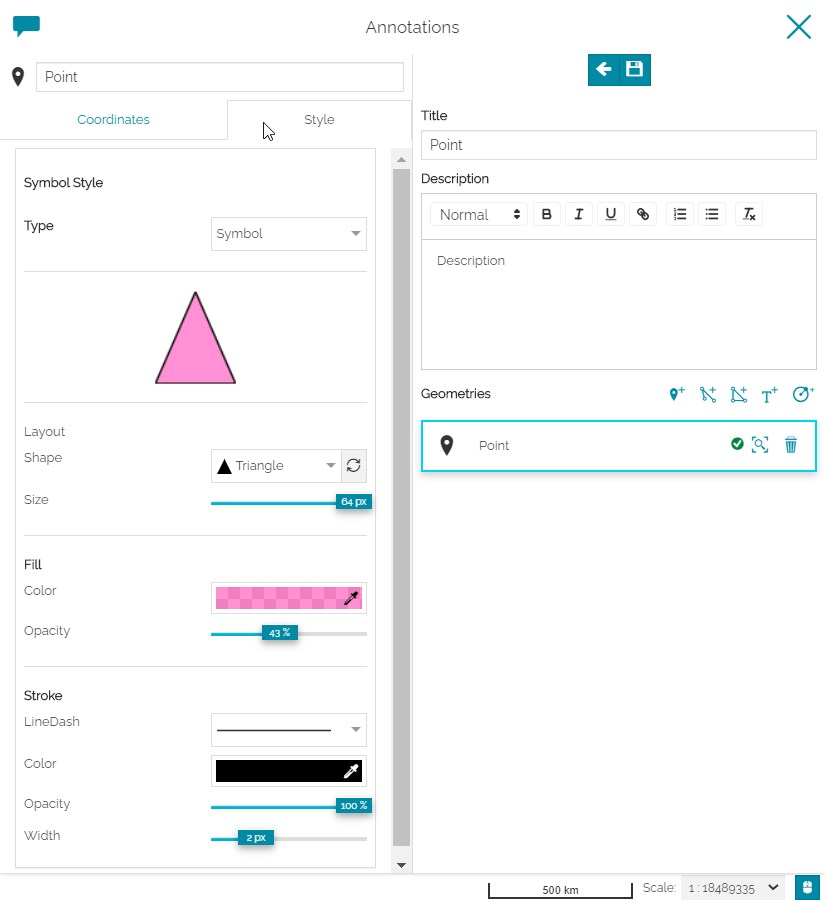
- Symbol types can have different
ShapeandSize, aFill colorwith a customizableOpacitylevel (%), aStrokeof different types (continuous, dashed, etc) and customizableColor,OpacityandWidth. Only few symbols are provided by default in MapStore but a custom list of symbols can be configured.
Polyline
Polyline annotations can be styled using the following editor:
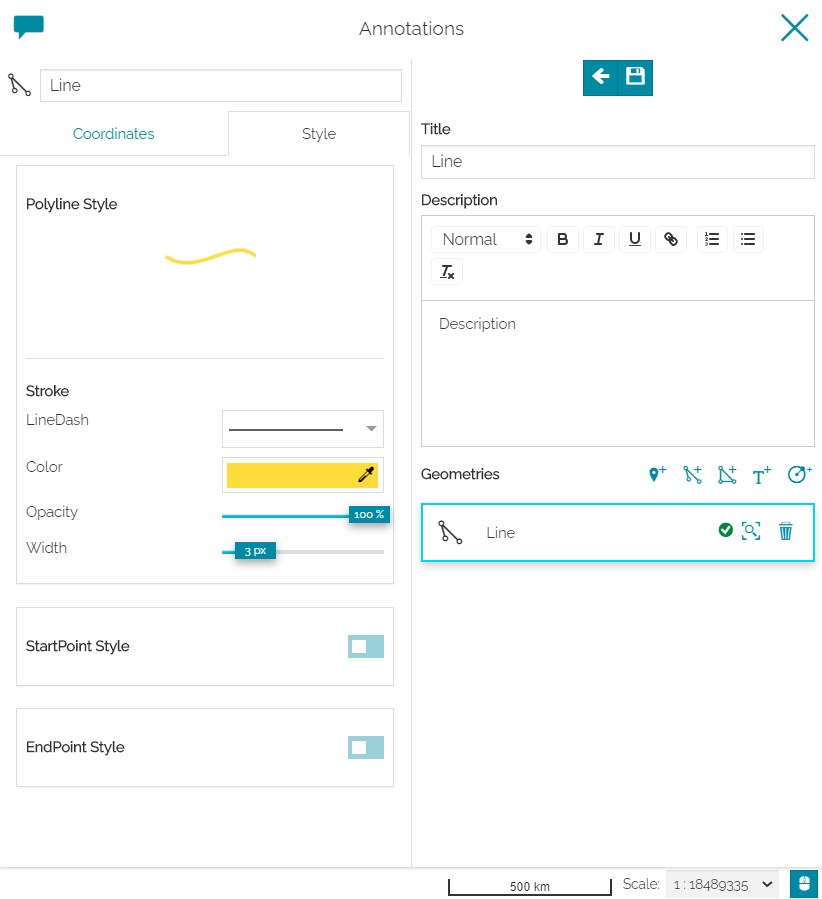
You can customize the Stroke in order to consider the Line/Dash type (continuous, dashed, dotted, etc), Color, Opacity and Width. You can also have styled Start/End Points: enable the StartPoint Style/EndPoint Style panel using the corresponding check box, the editor will be the same used for Marker/Symbol annotations.
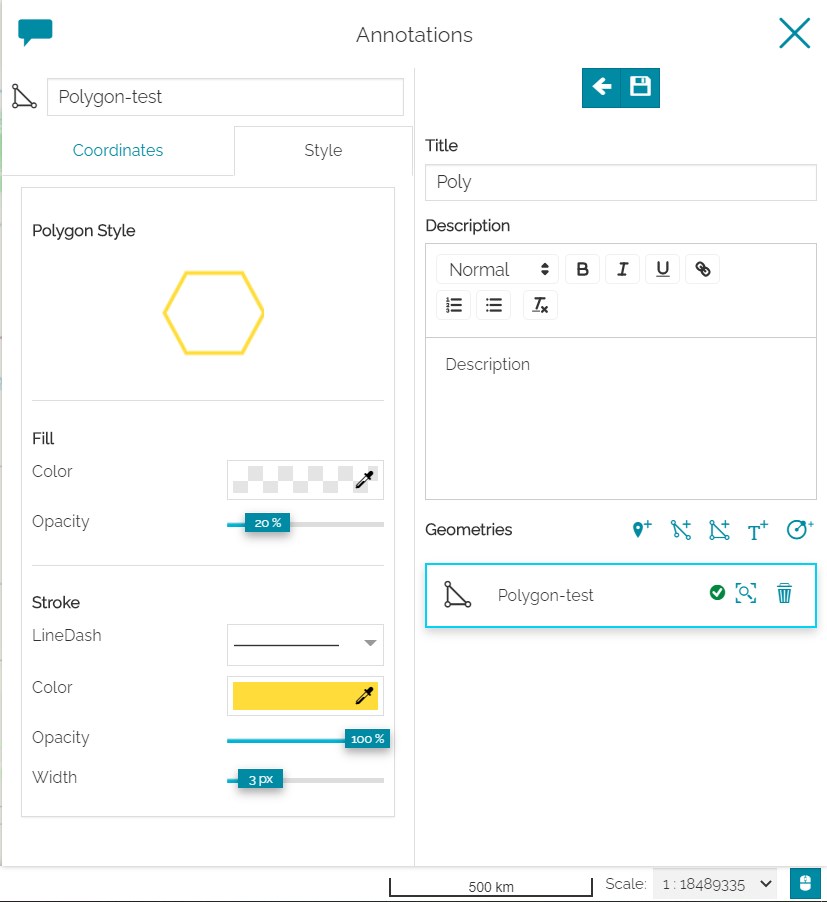
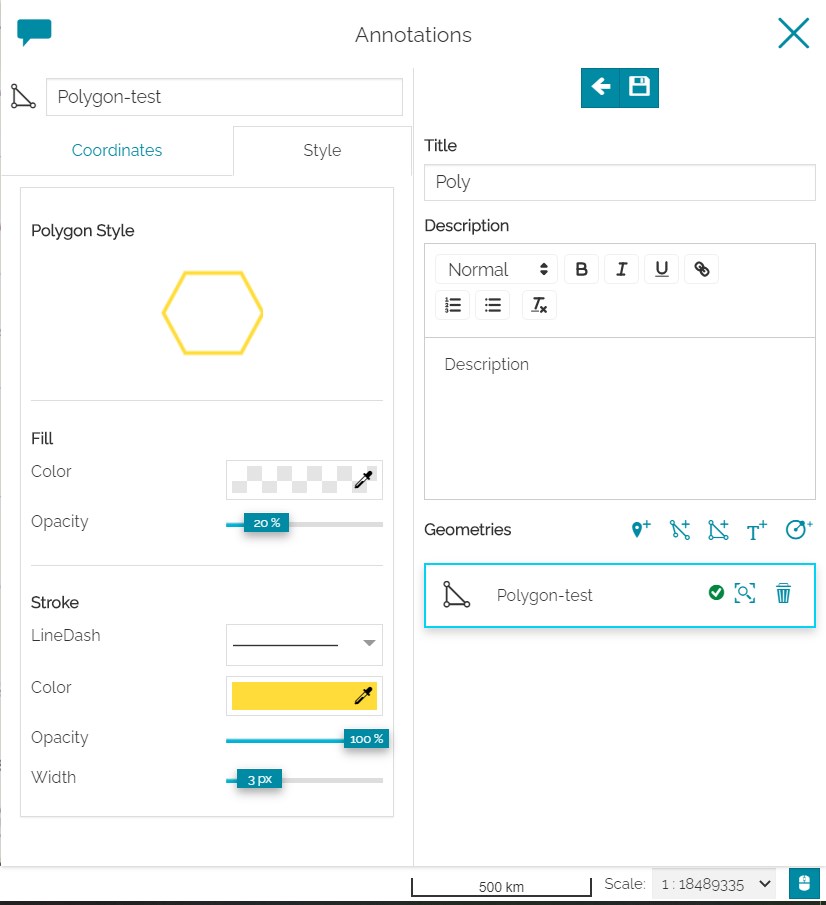
Polygon
With polygonal annotations changing the style means choose the Shape and the size the Size of the polygon, its Fill color (with custom Opacity), the type of the Stroke (continuous, dashed, dotted, etc), its Color, Opacity and Width.
See the example below to better understand these options.
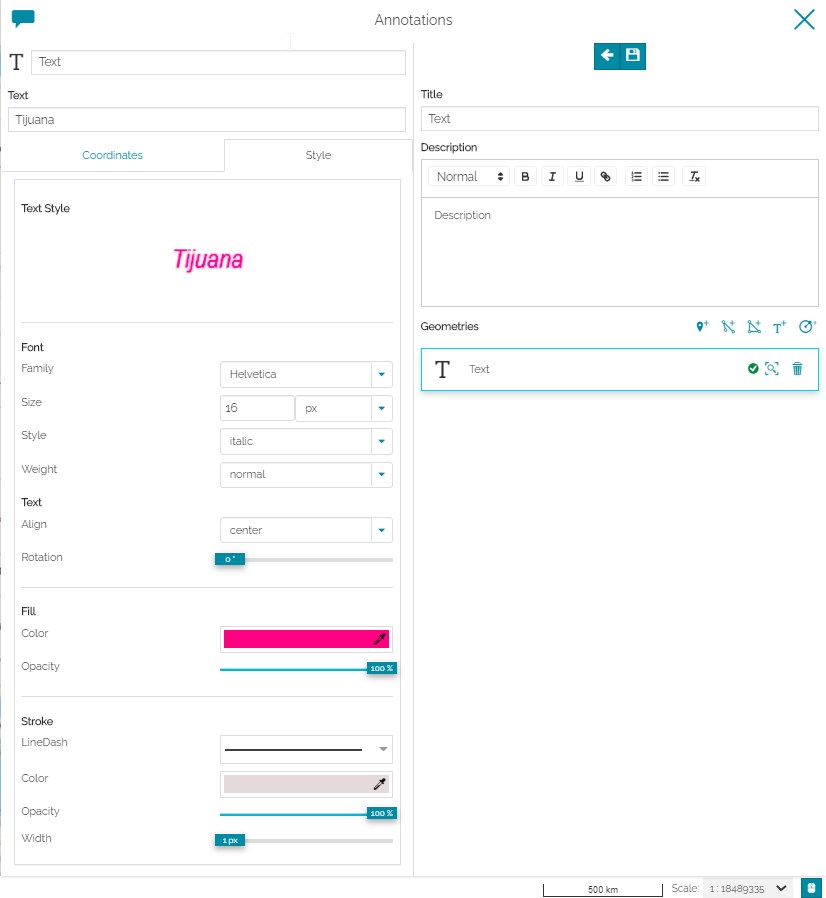
Text
Text annotations are a bit different from the geometric ones. They display a formatted text on a given point of the map.
The style editor lets you customize the text Font (Family, Size, Style, Weight) and the Alignment (left, center or right).
You can also choose the text Fill color and its Opacity, the Stroke type, its Color, Opacity and Width. Take a look at the following example.
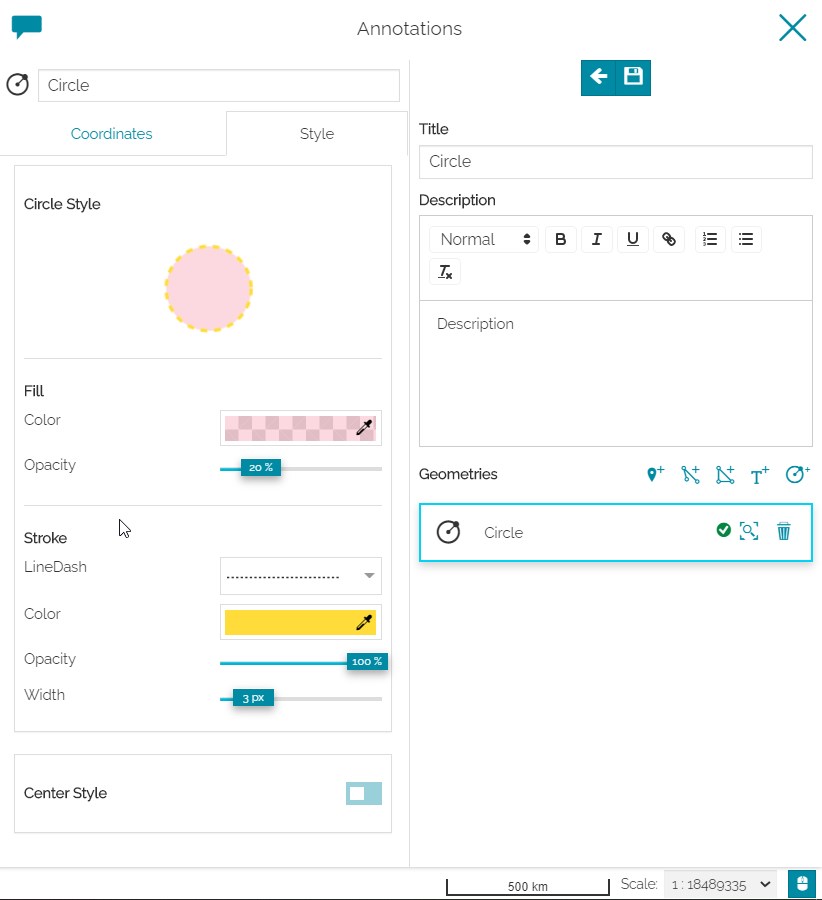
Circle
Circle annotations can have custom Fill color (with custom Opacity), Stroke type (continuous, dashed, dotted, etc) with custom Color, Opacity and Width. The Center can be also customized through the same editor described for Marker annotations.
See the example below.
Click on  to apply the style.
Managing Annotations
You can manage anytime your annotations through the Annotation Viewer. Click on some annotation to display it.
- You can edit your annotations by clicking the geometry card from list of geometries of the annotation. It allows you to change the geometry and/or the information related to the annotations. See the gif below to better understand how:
-
The
 button allow the map to zoom on the annotation.
 -
The
 button allow the user to show/hide the annotation on the map.
 -
Annotations can be also download in
jsonformat and reused in other maps. Using button you will be able to export your annotation in the
 Annotation.jsonfile and download it.
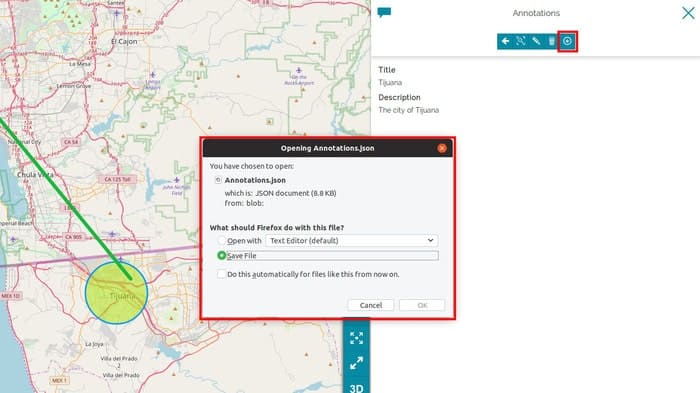
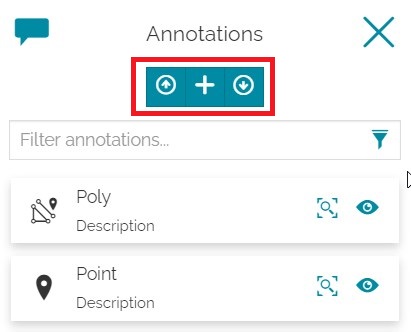
From the main panel of the Annotations tool you can also download/upload annotations to/from a json file.
-
Click on
to download a file with all the existing annotations. -
Click on
 to upload annotations from a valid
 jsonfile.