Resource Properties
In order to customize the properties of a resource, the Admin or a normal user with permission can access the Edit properties window from the Edit properties button ![]() in Homepage or from the Save and the Save as buttons inside the resource viewer.
in Homepage or from the Save and the Save as buttons inside the resource viewer.

Through the Edit properties window the user can perform the following operations:
-
Add a Thumbnail
-
Add a Name and a Description
-
Add a Permission rule
Warning
The name of a resource is the only mandatory field. Note that is not allowed to choose a name that has already been assigned to another resource.
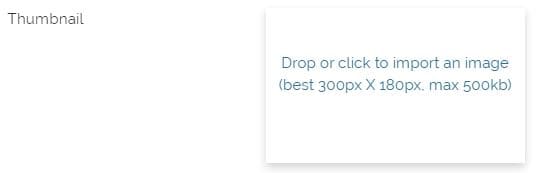
Thumbnail
It is possible to add an image as thumbnail dropping it or clicking inside the following box:
Warning
The image to be added must not be larger than 500 kb and its best dimensions are 300x180 px. The supported formats are jpg (or jpeg) and png.
Permission rules
In the Add a rule... section you can set one ore more permission rules in order to allow a group to access the resource. In particular it is possible to choose between a particular group of authenticated users or the everyone group that includes all authenticated users but also anonymous users (more information about different user types can be found in Homepage section).
Moreover it is possible to choose between two different ways with which the selected group can approach the resource:
-
View the map and save a copy
-
Edit the map and re-save it
In order to add a rule, the user can select the group and set permissions inside the Add a rule... section. Once the rule is set, with the Add button ![]() it is possible to add it to the Permissions Groups list.
it is possible to add it to the Permissions Groups list.
For example, a resource that can be seen by everyone, should have a rule like the following:
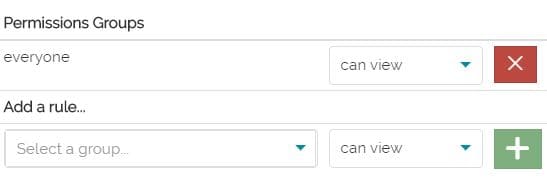
Once a rule is set, the user can always remove it through the Remove button ![]() .
.
How to manage users and groups is a topic present in the Managing Users and Managing Groups sections.
Details
Only for map type resource, and only from the Edit properties button ![]() in Homepage, it is possible to add some details to the map. In this case the Edit properties window is the following:
in Homepage, it is possible to add some details to the map. In this case the Edit properties window is the following:
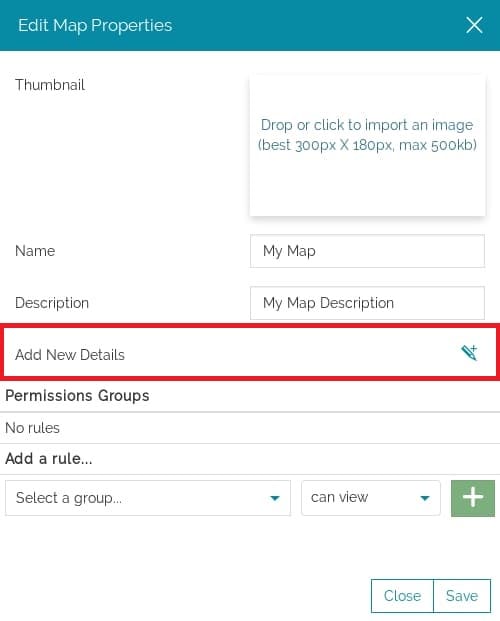
With a click on the Add new details button  it opens a panel where the user can write the details of the map.
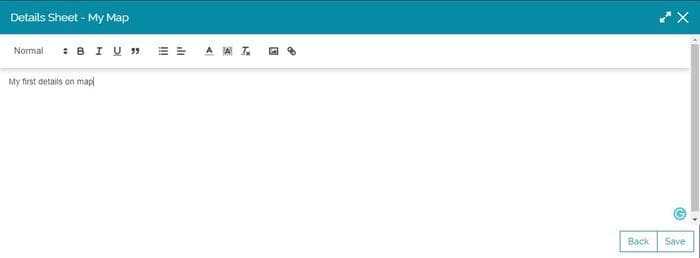
The text can be edited and some links and images can be added through the Text Editor Toolbar. Once the editing is done, the map details can be saved with the Save button  and other three buttons appear, in order to:
-
Show the details preview

-
Edit the details

-
Delete the details sheet

Once the details are saved, the Show details button  appears on the map card in Homepage

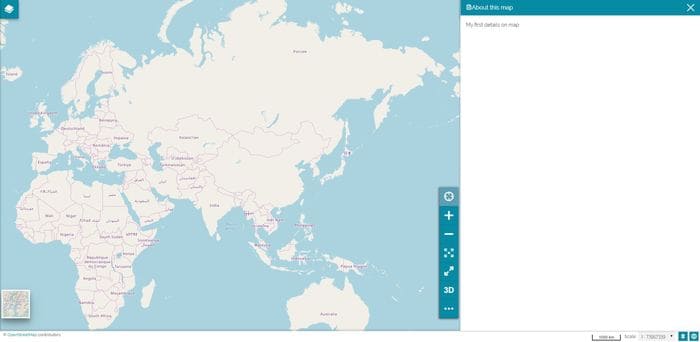
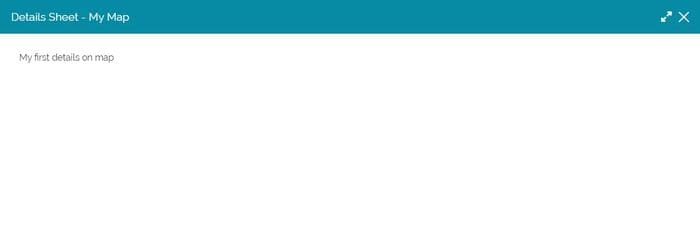
Through this button it is possible to take a look at the details:
The details, when present, are also available from the Burger Menu  inside the map viewer. Since details are added to a map, indeed, a new button called About this map
  is listed between the Burger Menu options, allowing the user to access the details from a dedicated panel: